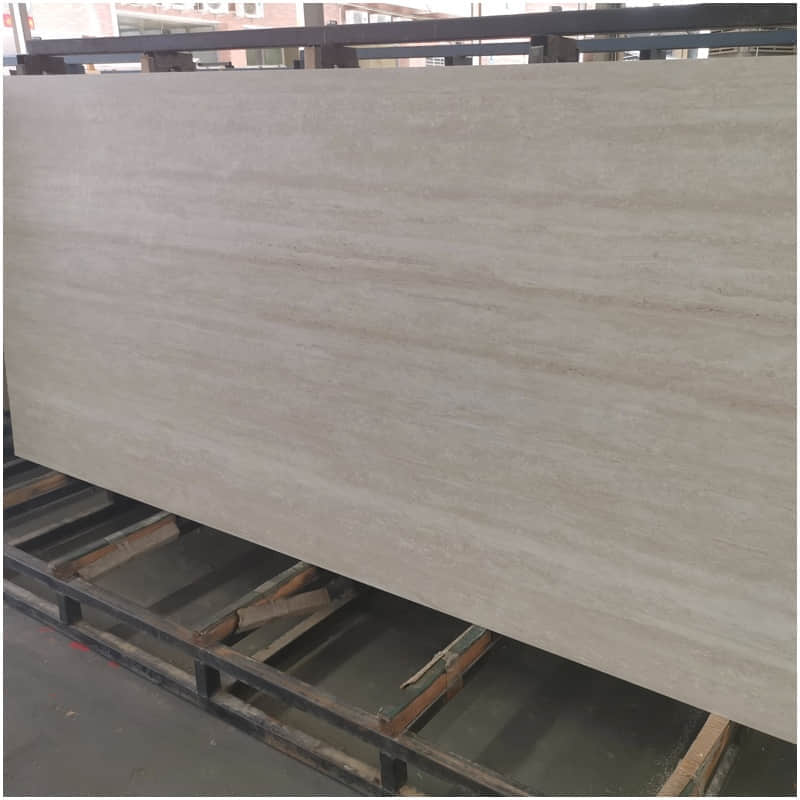

Sintered Stone
A new Building Material for Countertops, Wall Panels, and Tables for Residential and Commercial building Interiors and Exterior Projects
As a new material in the field of home and commercial real estate indoor and outdoor decoration projects, Sintered Stone home furnishings have large specifications, strong moldability, diverse designs and colors, high-temperature resistance, wear and scratch resistance, anti-penetration, acid and alkali resistance, and zero-toxicity compared to other home products: formaldehyde, environmental protection, and health properties.
In recent years, Sintered Stone has become a superstar among environmentally friendly materials due to its excellent physical properties, and it is highly respected and loved by designers.
Do you know anything about Sintered Stone Slabs? In this article, I will give you some answers about Sintered Stone Slabs.
1: What is a Sintered Stone?
Sintered Stone, also known as “sintered stone,” is an inorganic fiberboard made from natural mineral basalt as the primary raw material through a series of processes such as high-temperature melting, fiberization, and product post-processing.
The English description of the Sintered Stone slab is SINTERED STONE, which tranSintered Stones as “sintered dense stone.” It is made of natural raw materials and clay fired through a unique process. It is a new high-tech slab that integrates all the top technologies in slab production. It is currently the entire product in the panel industry.
The Sintered Stone Slabs combine several top-notch technologies and select high-quality raw materials. It is formed by a press of more than 16,800 tons, coupled with 8-channel high-definition inkjet engraving, and then fired at a high temperature of 1250°C. Compared with traditional ceramic tiles, it has superior physical properties such as fire resistance, frost resistance, wear resistance, stain resistance, corrosion resistance, high strength and impact resistance, zero water absorption, and zero penetration.

2: How are Sintered Stone Slabs produced?
Nowadays, Sintered Stone has entered more and more people’s homes. For ordinary decoration groups, Sintered Stone is a must-do homework. Searching for the word “Sintered Stone” on some SNS platforms yields millions of related content. It can be seen that people still have many doubts about this new material, including what is the difference between Sintered Stone and ceramic tiles. What is the difference between Sintered Stone and stone? How to choose Sintered Stone Slabs…
Today, we start with the production of Sintered Stone Slabs and learn about transforming ordinary sand into exquisite decorative materials. Everyone will have a clearer understanding of Sintered Stone Slabs.
Step. 01 Raw material preparation
① Homogenization of raw materials: Grind some strictly selected natural raw materials, such as albite, quartz, clay, etc., into powder and stir evenly.
② Ball mill slurry: Put the raw materials into the ball mill according to the specific process formula of the rock plate so that the raw materials, water, and ball stones are continuously rolled and thoroughly rubbed. After 13-15 hours of ball milling, mud with a fineness of 0.7-0.9 is formed. , which is much longer than the ball milling time of ceramic tiles.
③ Slurry iron removal and homogenization: After ball milling, the slurry needs to go through multi-layer vibrating screens to remove iron and then enter the slurry tank for homogenization to even out the moisture in the slurry, laying the foundation for improving the strength and toughness of the embryo body. Iron is removed because iron is a harmful element to the production of Sintered Stone Slabs. It affects the slabs’ whiteness and causes defects such as black spots, caves, and impurities on the slab surface.
④ Spray drying powder: The slurry enters the spray drying tower through the automatic slurry conveying system. In the spray tower, the slurry is dried and dehydrated to form a powder with a moisture content of only 7%.
⑤ Powder aging and testing: To prevent particles that do not meet the strength requirements from entering the next step, the powder must be stored and aged for no less than 12 hours to make the moisture in the powder more uniform and ensure product quality.
Step. 02 Material forming
⑥ Press molding: To answer this question, we need to understand the critical production equipment that determines the quality of Sintered Stone Slabs – the press. Theoretically, the heavier the tonnage of the press, the more uniform the pressing, the higher the density of the Sintered Stone Slabs, and the more stable the quality.
⑦ Drying of the embryo body: Use a drying kiln to dry the body again to remove the moisture.
Step. 03 surface treatment
⑧Glaze line process: Cover the glaze slurry evenly on the surface of the embryo body, making the embryo body smoother and more accessible to produce high-precision printing in the next step.
⑨Inkjet printing: The glaze blank is sent to the inkjet printing machine through a conveyor belt, and the computer-preset pattern is directly printed on the surface of the glaze blank. This step is very demanding and now determines the quality of the finished product. Advanced production equipment can ensure uniform thickness of the glaze layer, realistic texture, three-dimensional color, and transparent layers.
⑩Generally conventional products are formed after completing the above process. Some high-end products also require special techniques, such as fine matte dry granulation, ice crystal dry granulation polishing, dry granule bright polishing, and other complex procedures.
⑪Kiln firing: Put it into a kiln with a temperature above 1200°C. The firing time is 80-150 minutes, about three times that of ceramic tiles. This allows the Sintered Stone Slabs to be heated evenly and is not easy to crack when used. After firing, the temperature of the Sintered Stone Slabs is very high, and it adopts rapid and slow cooling methods.
⑫Polishing process: Coarse polishing – to reduce surface roughness; medium polishing – to remove surface scratches left by rough polishing and produce a medium or above the bright surface; fine polishing – to create a shining surface.
⑬Super clean and bright application: Sintered Stone is often used on kitchen countertops and dining tabletops. To improve the anti-fouling ability of the Sintered Stone, it is necessary to apply a layer of nano-scale anti-fouling agent on the surface to form a layer of dense protection with particles as small as nanometers. Layer.
⑭ Trimming and blowing: Put the Sintered Stone Slabs into the automatic edge grinding machine, and the corners will be neatened after the machine operation.
Step. 04 Post-processing
⑮Inspection and grading: intelligent machine inspection + manual inspection to detect flatness and color difference. If cracks and impurities are found, they need to be downgraded.
⑯ Storage and storage
After a complex and delicate process, a Sintered Stone slab that combines the advantages of “light, thin, beautiful, and large” was born! Artistic design, high-quality raw materials, advanced equipment, and rigorous testing… all reflect the ultimate craftsmanship and express people’s attitude toward quality life.
3: Sintered Stone Slab production equipment
Throughout the ages, every emergence of new materials has brought significant progress to human civilization. Sintered Stone, characterized by its large, light, and thin image, has entered people’s field of vision. Its birth is inseparable from technological innovation.
3-1 What is the production equipment for Sintered Stone?
The production of Sintered Stone mainly includes core equipment: ball mills, spray towers, full-body cloth machines, Sintered Stone forming presses, digital inkjet printers, digital dry granulators, kilns, polishing equipment, automatic detection equipment, etc.
Currently, the stone slab production line equipment used by my country’s ceramic enterprises mainly comes from several major brands, namely System LAMGEA, imported from Italy, Sacmi continua+ from Italy, SITI B&T, and domestic press giants Keda and Heng. Litai.
3-2 What are the methods of forming Sintered Stone presses?
Forming is a critical link in the production of Sintered Stone. There are three process modes for creating Sintered Stone: dry pressing traditional forming method, roller pressing continuous forming method, and moldless belt creating a plan. The three forming processes correspond to three different forming presses. Machine.
3-2-1 Dry pressing traditional molding method:
Dry pressing is a traditional ceramic tile that uses a molding method- molded molding. Dry press molding is putting the coarse powder with good fluidity and suitable particle gradation into the metal mold cavity, applying pressure through the indenter, and the indenter will move in the mold cavity and transmit the pressure to make the powder in the mold cavity. The bulk particles are rearranged, deformed, and compacted to form a ceramic blank with a particular strength and shape.
Compared with other molding equipment, dry-pressing presses make it easier to control the binding force. During production, the pressure in the middle and around the brick can be kept consistent, which helps reduce the cracking problem in Sintered Stone cutting.
3-2-2 Roller pressing continuous forming method:
The roller pressing process is realized through two tough motorized belts. Under the simultaneous operation of the motorized belts and the pressing rollers, the powder is gradually “continuously” pressed into shape.
The Continua+ press of the Italian SACMI company uses the roller continuous forming process. The Continua+ straight-forming production line uses upgraded, fully automatic equipment with greater pressing force and higher density than traditional presses. At the same time, Continua+ can produce finished products of any size and thickness of 3-30mm.
3-2-3 Moldless belt forming method:
Belt forming does not require a mold. There is a circulating belt at the top and bottom of the press. Ceramic powder is placed on the lower sash. The belt transports the powder to the pressing area. The upper and lower straps are squeezed to form the finished product.
The System LAMGEA moldless press is the most representative, which uses a specially designed hydraulic circuit with a maximum pressure of 50,000 tons. The hydraulic system evenly distributes the pressure to the ceramic tile surface. The advantage of LAMGEA is that the thickness of the pressing can be changed at will without the need for other adjustments on the production line.
4: What are the processing surfaces of Sintered Stone?
According to the surface, it is divided into bright surface, matte surface, washed texture surface, silk surface, pearlescent surface, soft surface, mold surface, and finely carved surface.
The touch of these eight surfaces is very different. The currently popular surfaces are mainly high-gloss, matte, washed textured, and silk!
■ Glossy surface: similar to the marble surface we usually use, smooth and slightly reflective under sunlight.
■ Matt surface: It is not polished at all, but it can show the texture.
■ Silk surface: It feels smooth and delicate, like silk flowing in the hand.
■ Pearlescent surface: The entire surface will emit a faint pearlescent color.
■ Soft surface: Delicate and soft, the brightness is generally 39-65 degrees. After polishing, there will be delicate pores and poor stain resistance.
■ Mold surface: It has a concave and convex feeling. The cloth, woven, and burned surfaces are all mold surfaces.
■ Matt surface: It is not polished at all, but it can show the texture.
■ Carved surface: Special ink is formed on the surface, such as the texture of wood grain bricks.
5: Sintered Stone processing technology
About cutting, drilling, chamfering, grinding, and other deep processing of Sintered Stone
The trend of Sintered Stone is sweeping the decoration market in my country.
Because of its beautiful appearance, high hardness, and corrosion resistance, it is Easy to clean, healthy, and environmentally friendly; it is gradually entering thousands of households, whether on the wall or the ground, Or applications in various home customization scenarios.
Deeply processed products of Sintered Stone are moving toward various construction projects. Loved by designers and modern young people.
First of all, let’s talk about the processing of Sintered Stone. From the designer designing drawings and processing details of the required Sintered Stone shapes according to customer needs to the processing center cutting the Sintered Stone according to the pictures, etc., to obtain the Sintered Stone—finished board processing.
5-1 Sintered Stone cutting process
Product processing can use saw blades or waterjet cutting machines specially designed for cutting Sintered Stone. A cutting device for straight-line cutting of flat glass can also be used.
- Before cutting, check the cutting machine, especially in the following aspects:
- Cutting tools should be suitable for Sintered Stone products and have good performance.
- The machine’s workbench must be clean, durable, solid, and damage-free.
- The machine’s work surface must be perfectly level.
- The workbench of the machine must be free of waste materials from previous processing, and everything should be in good condition on the surface. Therefore, it is recommended that the processing operator takes samples for actual testing and makes adjustments to achieve the best results before cutting.
- Suppose you are dissatisfied with the cutting effect or the rock plate cracks during the cutting process. In that case, it may be due to the feed speed, operating pressure, improper prop rotation speed, uneven cutting table, or the movement of the rock plate during the cutting process. Vibration, offensive cutting tools, and other reasons cause it.
- After processing, you need to pay attention when handling the Sintered Stone, especially if openings or holes are in the slabs’ middle. Use multi-cup suction cups to avoid lifting both ends of the board directly over the edge to avoid bending the finished product. Be careful when moving vertically manually to prevent twisting and breaking.
- Use a special cutting disc suitable for Sintered Stone or a high-quality diamond cutting disc for porcelain products, and perform it on a tax point cutting machine.
- Both U-shaped cutting blades and toothless saw blades can be used.
- The Sintered Stone must be fed in the same direction as the cutting blade rotates during the cutting process.
- The cutting opening is proportional to the thickness of the cutting blade.
- Before cutting, check the cutting machine. The workbench must be in good condition, flat, altogether level, and free of processing waste.
- The smaller the radius of the cutting blade, the greater the spindle speed.
- The slower the feed speed, the better the cutting effect.
- Slow feed speed ensures less edge chamfering.
- Feed and discharge speeds should always be 50% slower than the rated speed.
- The right direction and the right amount of water.
- The cutting blade should be exposed as little as possible, at least one millimeter beyond the thickness of the board.
- The lower the vibration during cutting operations, the better the results. Place disposable wooden or rubber-based (e.g., vulcanized rubber) boards under the Sintered Stone to reduce vibration.
5-2 Sintered Stone drilling process
1. Square holes in thick plates:
(1) Process: Positioning of the measuring tape – opening holes at the four corners – X-shaped cutting – cutting on the four sides – polishing
(2) Key points:
1. Tools: construction workbench, electric hand drill, hand cutter, tape measure, carpentry pen
2. Advantages: high cutting stability, not easy to break, straight edges
(1) Change the right angles of the square hole into rounded corners so that the corners will not easily crack during the cutting process and later use;
(2) Because the tensile force of cement or adhesive can make the Sintered Stone bear greater tension, it is less likely to crack than the direct method of drilling small round holes at the four corners and then opening the holes.
(3) Wide range of use, can cut square holes of any size;
(4) Sintered Stones with a size of 2.4 meters and above are relatively thin. To prevent cracking, anti-crack treatment can be performed on the four sides of the opening before cutting and opening.
2. Opening round holes in thick plates:
(1) Process: Positioning of the measuring tape – 30-degree oblique drilling – water cutting – polishing
(2) Key points:
1. Dimension ruler positioning: select a punch drill bit of appropriate size;
2. Drilling at a 30-degree angle: Make a hole at the selected position, paying attention to the 30-degree angle;
3. Cutting with water: Pay attention to adding water for cooling during construction and use even force;
4. Polishing: Pay attention when cutting, and avoid bumping and polishing.
5-3 Sintered Stone chamfering process
Thick plate chamfering
(1) Process: Positioning of the measuring tape – Adjusting the angle of the blade – Cutting at a uniform speed – Grinding with a steel brush – Grinding after fitting
(2) Key points:
1. Tools: construction workbench, electric hand drill, hand cutter, tape measure, carpentry pen
2. Advantages: high cutting stability, not easy to break, straight edges
(1) Fix the guide rail to the specified size position and adjust the angle of the cutting machine;
(2) A thickness of about 2mm needs to be reserved for a 45-degree cutting entry angle; otherwise, it will easily cause chipping and breakage, and the knife needs to be cut slowly when pushing;
(3) When you cut, please consider whether the cutting surface is consistent. If there is any deviation, stop the cutting machine and make fine adjustments;
(4) After the cutting is completed, use a polishing disc to polish it so that the cut surface is smooth and smooth to achieve a beautiful effect.
5-4 Sintered Stone polishing process
■(1) Process:
1. Double-sided Sintered Stone wall panel;
2. Fit the 45-degree chamfered Sintered Stone side by side and use infrared rays to position the verticality;
3. Use color-matching AB glue to fit the corner;
4. After the AB glue is dry and hard, use a steel brush to polish it.
■(2) Key points for shaping:
1. After lamination, it can be fixed with 502 glue or tape;
2. Fix with special wooden hooks.
■(3) Effect standards:
1. To avoid edge chipping, a thickness of about 2mm will generally be left for on-site chamfering;
2. Use adhesive of the same color and then polish.
Sintered stones can withstand deep processing such as cutting, drilling, chamfering, and grinding, have more muscular toughness, and are less likely to burst and break. As a result, it is widely used in cross-border fields such as furniture panels and kitchen and bathroom customization, bringing unlimited possibilities to the space.
6: Stone slab seamless splicing process and precautions
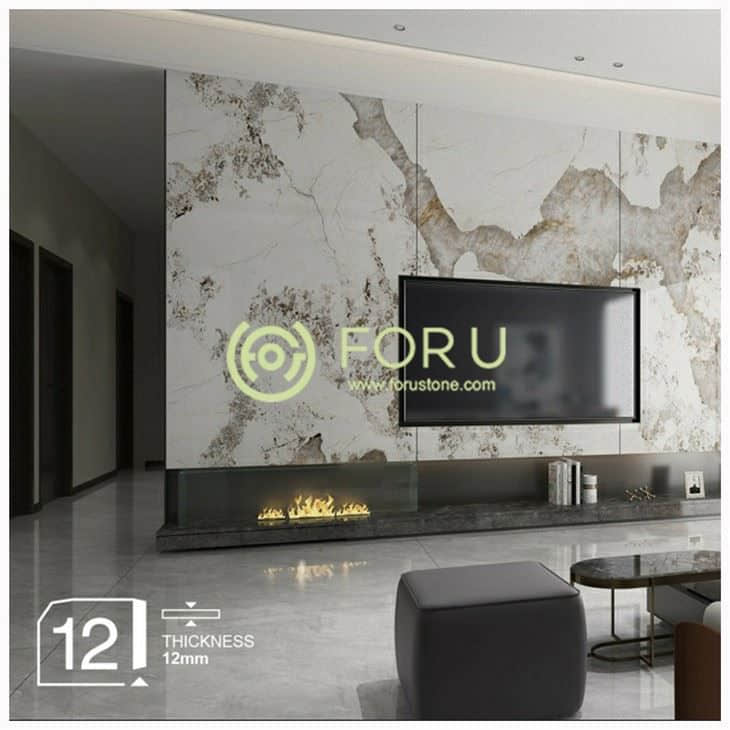
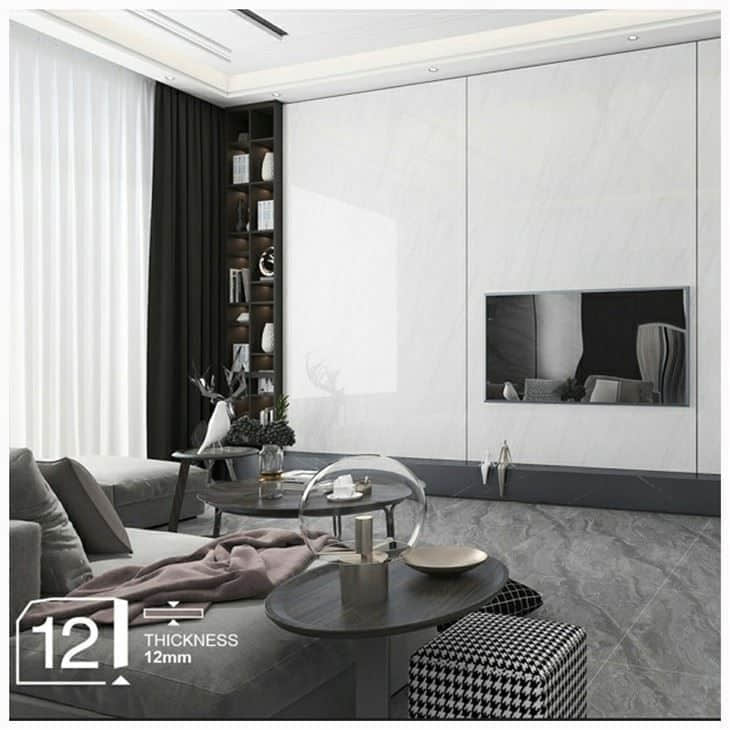
Sintered Stone has exquisite artistry, sound decorative effects, and many styles, and it is not easy to trap dirt and evil. Therefore, it is widely used in various decorations such as living room background walls, kitchen countertops, bathroom sinks, wardrobe door panels, coffee tables, cabinets, stair corners, etc. Scenes.
When closing the external corners of Sintered Stones, the 45-degree seamless splicing method is usually used.
Seamless splicing means chamfering at 45 degrees forms a sharp angle with the glaze surface, leaving zero edges for collision. This method makes creating smooth lines and a natural sense of space easy.
The on-site processing of seamless splicing of Sintered Stones is complex and requires the master to have a particular experience. Let’s share with you the specific process flow and precautions.
6-1 45-degree angle cutting
Seamless splicing is usually processed with a water jet in a processing plant or with a particular 45-degree chamfering machine for Sintered Stones and requires high machine performance.
Processing accuracy determines the quality of the finished product. Therefore, precise angles and smooth cuts are required during processing to ensure beautiful, flawless, and seamless splicing.
6-1-1 When cutting large Sintered Stones, the cutting machine needs to meet the following standards:
The motor speed is around 6000 rpm;
The blade should be a professional cutting blade;
The flatness requirements of the machine platform are very high;
The measuring tape must be accurate, input the data on the machine tool, and leave at least a 20mm margin on the chamfered edge;
When the machine head is retracted after cutting, the machine head must be able to rise to avoid secondary damage.
6-2►Processing before splicing
There will be more or fewer defects when grinding, so before splicing, it must be manually polished with a sponge and inspected twice to ensure quality.
Could you be careful to clean the dust before splicing?
6-3►Splicing and pasting
Clamps should be used for positioning when splicing to ensure the angle is vertical and beautiful.
After positioning, use Sintered Stone splicing glue to fill in the interface position, apply tape, pull it to fix, and let it sit for 3-10 minutes.
When the glue is dry, please first deal with the spilled glue.
6-4►surface treatment
After the glue dries and is completely solidified for 5 hours, use a utility blade to scrape off the excess glue, or polish it with a sponge or angle grinder (when the grinding blade makes a crisp sound, stop shining immediately. Otherwise, it will damage the glaze and destroy the beauty).
After the glue is clean, polish it with no less than 1000# sandpaper. You can also wipe it with wool pieces to brighten the surface gloss.
If necessary, you can also apply a layer of wax on the surface for protection.
6-5►Reinforcement, waterproof, and anti-fouling treatment
Use unique edge strips or corner codes to reinforce the back of the interface to improve splicing stability and prevent falling off and cracking.
Bathroom sinks and other locations need to be reinforced with specific waterproof tapes, and then use commonly used structural glue to glue all joints a second time.
Finally, could you apply an antifouling agent on the interface to protect the finished product from external contamination?
6-6 Precautions
1. The interface must be clean and free from oil stains. Please do not touch it repeatedly with your hands. Otherwise, it will easily blister and turn yellow after being glued.
2. The interface treatment should be smooth and not uneven, which would affect the appearance.
3. Try to choose Sintered Stones with the same thickness; otherwise, the thin slabs must be raised.
4. Choose quality-assured Sintered Stone splicing glue to prevent it from falling off.
5. Select/mix glue with the same color as the Sintered Stone so that the naked eye can see no noticeable difference after pasting.
6. Choose high-quality paving materials resistant to high and low temperatures to ensure stability.
7. When grinding with a sponge or angle grinder, grind at a 45-degree angle.
7: what’s the difference between marble and Sintered Stone? (Sintered Stone Panel VS Natural Marble)
Marble has always been a popular domestic construction fabric, and its excessive stop and luxurious qualities have acquired rave evaluations in space decoration. Sintered Stone has recently shone as a new decorative cloth in many space decorations. The Sintered Stone concept has frequently entered the public eye and has received further attention in the construction materials industry. So, what precisely is the difference between marble and Sintered Stone?
01 The source and look are distinctive
Marble has a herbal texture and is diverse, sensitive, and wealthy. Every piece has particular herbal splendor and a luxury feel that must be copied elsewhere. At the same time, there will also be raw, small seams and flaws, which require polishing, waxing, and everyday care.
Sintered Stone is industrially processed, so the arrival of the same sort of slab is tremendously consistent. The feel of the Sintered Stone is particularly an imitation of herbal stone, and the surface is close to that of herbal stone. The permeability and texture are better than marble. However, the advent is higher. The famous Scapa Staircase is the representative work of a Sintered Stone staircase.
02 special element systems
Marble is mainly composed of calcite, limestone, serpentine, and dolomite. Its main additives are calcium carbonate (the total proportion is more than 50%), magnesium carbonate, manganese oxide, and silicon dioxide.
Sintered Stone is a product of natural uncooked substances (silica, inorganic clay, feldspar powder) via a unique manner, pressed with the assistance of a press and fired at an excessive temperature of 1200°.
03 different bodily and chemical
- Hardness:
The Mohs hardness of marble is 2.5-5. The texture is dense but straightforward. It is clear to technique, carve, grind, and polish.
- Sintered Stone has a Mohs hardness of 6-7, making it more challenging and put-on-resistant than marble. However, it usually refers to the overall hardness. The rims are inconsistently harassed. Pots and pans are prone to chipping and harm if they accidentally hit the boundaries. Consequently, the hardness is high but very brittle.
- Denseness:
The density of marble varies substantially in line with distinctive types. Generally speaking, it is noticeably unfastened and clean to penetrate. However, marble interior decoration can also be durable if well-maintained.
Sintered stones are dense and protective against scratches, penetration, and stains.
- Stability:
Marble has stable physical properties, high plane precision, can ensure long-term non-deformation, small linear enlargement coefficient, no gradual feeling, is not stricken by moisture, and has accurate plane balance.
Sintered Stone has excessive stability and is wear-resistant and durable. But, it is easy to interrupt because of its extreme hardness. We’ve additionally visible many examples of Sintered Stone eating tables breaking.
04: different processing difficulties
- Compared with Sintered Stone, marble has greater freedom in processing and shaping. The rims and edges can be polished to be sensitive and translucent and used to procedure and layout sculptures, columns, and different products.
- The processing of Sintered Stone could be more robust. It’s far liable to side chipping, cannot be polished, and can’t be repaired after damage. Managing the rims and edges is cautiously challenging, so it’s miles improper for complex shapes.
- Sintered Stone and stone have benefits and drawbacks, and clients can pick out in step with the fashion and function they want. For instance, using Sintered Stone as floors, kitchen countertops, and eating tables is easier to maintain. Each can be used as history partitions, stair steps, partitions, flooring, ornamental cupboard doors, and so forth. Places with powerful decorative results and individuality, including historical past divisions, marble, or luxury stones with particular textures, can also be used.
8: What is the difference between Sintered Stone and ceramic tile?
Sintered Stone Slabs Vs Ceramic Tiles(Porcelain Slabs)
Sintered Stone is a new type of material that belongs to the category of boards. The English description of Sintered Stone is SINTERED STONE, which means sintered stone. Its hardness is stronger than igneous rock (granite and the like). It is formed by the condensation and crystallization of molten magma created by melting underground stones at high temperatures (625-1200°C).
The sintering process of Sintered Stones is relatively complex. It is a process that reproduces the natural formation of natural stone for thousands of years in a few hours. The natural stone and inorganic clay must be pressed at a high pressure of 400 bar and then put into the most advanced furnace with a temperature higher than 1280°C. Using state-of-the-art vacuum extrusion molding equipment and fully automatic closed computerized temperature-controlled roller kiln firing, combined with NDD technology, we can finally produce ultra-thin, large-sized high-tech decorative panels with various exquisite texture effects.
8-1 The difference between Sintered Stone and ceramic tiles
The composition of Sintered Stone is entirely different from that of ceramic tiles. The main component of tiles is kaolin, while Sintered Stone is mainly composed of inorganic oxides such as natural laminated rock, natural clay, silica, and feldspar powder. Moreover, the Sintered Stone does not contain glaze, and the luster of the Sintered Stone is formed by machine polishing. Sintered Stones are large slabs, not large-sized bricks. This makes Sintered Stones a new favorite in engineering projects.
Sintered Stone is made from the above materials through a unique process, then pressed by a 36,000-ton press, combined with NDD technology, and fired at an ultra-high temperature of more than 1,200 degrees.
Ceramic tiles are made through ball milling and grinding to achieve a certain fineness and uniform distribution of materials; spray granulation: in the powder warehouse, the raw materials are put into the warehouse and left naturally for 48 hours to ensure complete mixing and pressed by a press. Generally, ceramic tiles are within 10,000 tons; in a fired system, the temperature is between 1050 and 1150 degrees.
From the production process point of view, the main difference is in the tonnage of the press. The Sintered Stone is heavier, and the firing temperature of the Sintered Stone is higher, so the stability of the formation is higher.
8-2 Specifications and Thickness of Sintered Stones
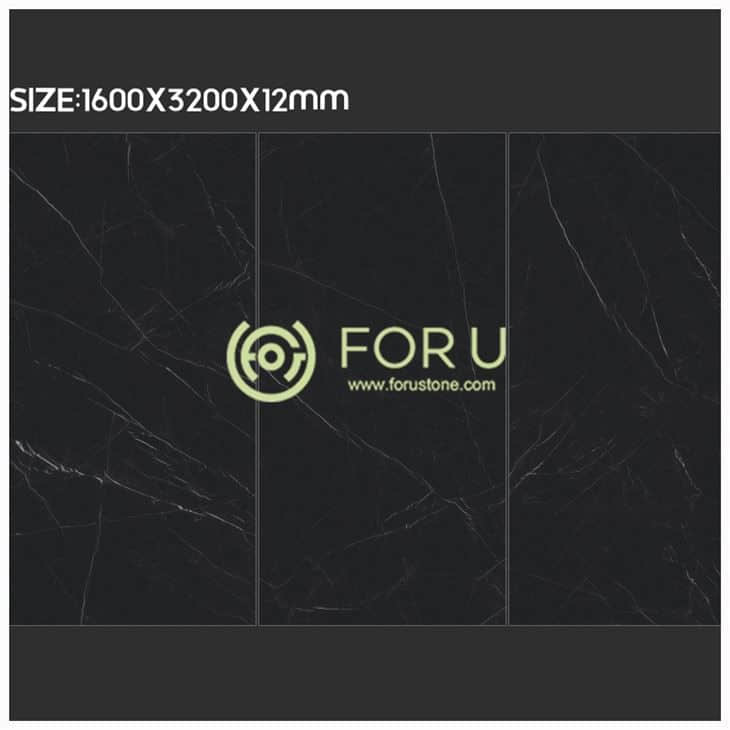
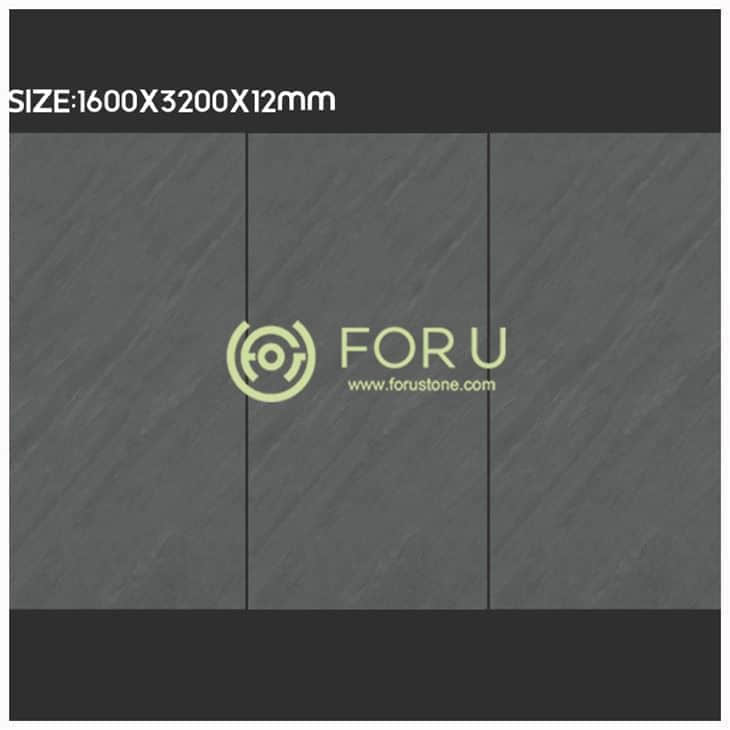
The characteristics of Sintered Stone specifications are large, including 1800×3600, 1620×3240, 1500×3000, 1200×3600, 1600×3200, 1000×3000, 1300×2600, 1000×2700, 760×2600, 800×2600, 2400×1200, 900×1 800 and other specifications, the thickness also ranges from 3mm-20mm.
8-3 Different application scopes
Sintered Stone has a wide application range, a solid decorative effect, and a realistic marble texture. Whether used in large spaces or home decoration, the visual impact highlights the atmosphere and improves the area’s quality. It can also be used as a countertop decoration material in the kitchen and bathroom space. And this is different from what ceramic tiles can do.
9 Sintered Stone VS Artificial Quartz Stone
Among the many candidate materials for countertops, stainless steel is easy to scratch; marble is good-looking. Still, it has poor anti-fouling properties, granite has poor appearance and radiation, and acrylic countertops are not hard and easy to crack… Taken together, only quartz stone and rock are left in the arena and got it.
9-1 Similarities between Sintered Stone and artificial quartz stone
Let’s first talk about the commonalities between the two. Sintered Stone and quartz stone are both fake boards at the attribute level.
Quartz stone is made of more than 90% quartz crystals, resin, and trace elements, which are solidified under vacuum and pressure under certain physical and chemical conditions through special machines;
Sintered Stone is made of natural raw materials such as natural stone powder and feldspar, which are pressed with the help of a 38,000-ton large press and then calcined at temperatures above 1,200°C.
Secondly, both are substitute materials for marble and have products that partially imitate natural marble texture.
The formation of natural marble requires a long process. This scarcity makes the price prohibitively high. At the same time, it is also notable because of its delicate and fragile properties. Therefore, various substitutes have been derived, including quartz and quartz stones. Sintered Stone. They are all better than blue. They restore the texture of natural marble, surpass it in performance, and are more affordable.
In addition, both are in the field of kitchen countertops, each occupying its niche.
As the most frequently used area in the kitchen, the countertop has high material requirements. It must withstand knives, grinding, fire, acid, alkali, oil, and salt, have appearance and style, and be formaldehyde-free and radiation-free. It even has to be durable and last forever…
To sum up, a high-quality kitchen countertop must meet five significant requirements: appearance, scratch resistance, heat resistance, stain resistance, and environmental protection.
9-2 The difference between Sintered Stone and artificial quartz stone
9-2-1 appearance
In terms of appearance, although quartz stone comes in many colors, its style could be more varied and exciting. Although some manufacturers have also developed stone textures, there are few choices; the color quality could be better, and there is a specific color difference. The tactile surface is also relatively single.
Sintered Stones are much richer in both visual patterns and tactile textures.
Through high-definition inkjet printers and mature glaze technology, Sintered Stone can easily be reproduced with stone, cloth, wood, leather, and even metal texture. It can be said that everything can be produced. In addition, due to the solid cross-border application capabilities of Sintered Stone, the kitchen countertop has a high degree of unity in style, matching the overall space.
9-2-2 Scratch-resistant
When it comes to scratch resistance, we have to mention Mohs hardness. Mohs hardness is a standard for measuring the hardness of minerals. It was first proposed by German mineralogist Frederick Mohs in 1822. The bar has ten levels, with level 1 having a hardness close to paper, level 5 being close to stainless steel, and level 10 being diamond.
According to this standard, the hardness of quartz crystal (SiO2) is level 7. But it does not mean that the hardness of quartz stone reaches level 7.
Because quartz stone is composed of quartz crystal (90%-94%) + resin (6%) + other trace elements, the hardness of quartz stone is much lower than quartz crystal. How much lower? Depends on the content of quartz crystals. When the quartz crystal content reaches more than 93%, the hardness of quartz stone can get between 5 and 5.5. The hardness will be lower if it is lower than this content standard.
Therefore, only qualified quartz stones are on the market, with Mohs hardness between 5 and 5.5. Although this hardness level is quite good, it is still slightly inferior to Sintered Stones. This difference is not apparent if you scratch it with a key, but if you cross it with a steel ruler or a bone chopper, it will be obvious immediately.
9-2-3 Heat resistance
Heat resistance can also be understood as high-temperature resistance. For kitchen countertops, direct contact with high-temperature objects is common. If the heat resistance of the board is not good enough, it will quickly explode.
Although the overall temperature of quartz stone can reach 300°C, it is still inevitable that it will burst when it comes into contact with a hot pot in daily life.
The main reason is that quartz stone is a “brittle polymer composite material” with specific thermal expansion and contraction characteristics. This causes the quartz stone to burst when heated locally and cannot withstand the internal stress caused by thermal expansion and contraction.
The Sintered Stone itself is calcined at a high temperature of over 1200°C. When exposed to open fire, it will not deform in direct contact with high-temperature objects and worry physical changes such as shrinkage, cracking, or discoloration.
9-2-4 Anti-fouling
In terms of stain resistance, it mainly depends on water absorption. The lower the water absorption rate, the higher the density of the board, the less likely it is for oil stains to penetrate, and the smaller the chance of water and color bleeding.
The water absorption rate of high-quality quartz stone is the same as that of Sintered Stones, which is less than 0.02%.
However, most quartz stones on the market with a unit price of less than 1,000 yuan have a water absorption rate of more than 1%. This has led to many people reporting that it is common for quartz stones in their homes to start to yellow after only one or two years.
Even high-quality quartz stone has its natural enemy, which is tea water. Because the tea polyphenols in tea water are readily soluble in water and fat, and the raw materials of quartz stone contain resin.
Because the Sintered Stones are pressed and formed by a 38,000-ton large press during the production process, the density of the slabs is very high, the water absorption rate is less than 0.02%, and almost zero penetration is achieved.
9-2-5 Environmental friendly
Regarding environmental protection, there are only two things to look at: radiation and formaldehyde.
Although the radiation of high-quality quartz stone is very low, it does not harm the human body. However, the production process requires high-temperature curing of the adhesive, which increases the possibility of the presence of formaldehyde.
In contrast, there is no possibility of adding formaldehyde during the entire production process of Sintered Stones made of inorganic non-metallic materials calcined at high temperatures. Even for Sintered Stone glue, its main ingredient is non-toxic and odorless acrylic AB glue. The strength is to be non-toxic, aldehyde-free, radiation-free, healthy, environmentally friendly, and safe.
Based on the above comparison results, Sintered Stone is superior to quartz stone in appearance, scratch resistance, and heat resistance and is on par with high-quality quartz stone regarding stain resistance and environmental protection.
Even high-quality quartz stone is slightly inferior to Sintered Stones, let alone those low quartz stones.
In terms of price, the price of genuinely high-quality quartz stone is comparable to that of Sintered Stones.
10 Super performance of Sintered Stone
2-3-1 Ultra-thin and ultra-light
Sintered Stones are thinner, only 1/3 of traditional ceramic tiles, and Sintered Stones are lighter, even less than 1/3 of conventional ceramic tiles. The average weight of traditional ceramic tiles is 23-27kg/㎡, while ultra-thin Sintered Stone is only 7kg /㎡and is easy to transport and install.
- Fearless Blade
The Mohs hardness is as high as level 6. With such high hardness, you can use iron nails or knife edges to scratch the surface of the Sintered Stone without leaving any traces. Even if a high-strength hard object hits it, it remains intact. It is ideal for aluminum-plastic panels, wallpapers, and even natural stone—unmatched performance.
- No fear of high temperatures
It does not discolor, smoke, or release harmful substances when burned at high temperatures, and it is fire retardant and does not fade. At present, the best ceramic tile products in the industry have a water permeability rate of as low as three thousandths. In comparison, the water permeability rate of Sintered Stone is two thousandths. The extremely high density makes it impossible for stains to penetrate, so there are no worries about surface cleaning. Ordinary stains can be wiped clean with just water.
- Super corrosion-resistant
Compared with the U-level (UA, UB, UC daily detergent corrosion resistance test) that traditional materials need to pass, Sintered Stone not only passed the UL (ULA, ULB, ULC light concentration acid, and alkali) level test but also obtained the UHA (UHA, UHB, UHC (heavy concentration acid and alkali) detection, is an exclusive product of European laboratory panels. Facing the daily acid and alkali in the bathroom and daily chemical lotions, it is calm, elegant, and unfazed.
- Antibacterial and antibacterial
100% environmentally friendly material, healthy and environmentally friendly, non-toxic, sterile, and radiation-free. It inhibits bacterial growth and can be in direct contact with food.
- Environmental protection and health
Purely natural materials are selected, and the production process releases no toxic or polluting substances. It can be crushed and recycled and is 100% recyclable, completely following the green and environmentally friendly concept of sustainable development.
Sintered Stone is an all-around material with characteristics such as being light, thin, stiff, resistant to high temperatures, acid and alkali, and easy to clean. Because Sintered Stone can not only be used on walls and floors, it can also be used in various indoor and outdoor decoration situations, such as desktops, walls, cabinets, chopping boards, barbecue tables, furniture, indoor and outdoor paving, outdoor projects, building exteriors, etc. Stone slabs are almost omnipotent and meet high-standard application requirements beyond imagination.
A large Sintered Stone is like a piece of cloth. The bigger the fabric, the greater the tailor’s imagination. Designers can cut it as they please according to their design needs. The processed ceramic tiles have a more sense of design and provide designers with a broader design space.
10-2 Non-Pros of Sintered Stone Panel
While Sintered stones have many performance advantages, they also have many flaws. We also need to understand them.
- Sintered Stone Panels are prone to burrs when the pressure is insufficient, which requires craftsmanship.
- Because Sintered stones are rugged, their deep-processed products are too brittle and prone to cutting cracks, posing safety risks.
- Cutting is difficult. The Sintered Stone material is rugged, and fine cutting is complicated. There are specific requirements for construction technology.
- During transportation and installation, brittle edge explosions may occur at the edges of Sintered Stone, so transportation requirements are high.
11 Sizes Ranges of Sintered Stone Large Format Slabs
Sintered Stone can be used in many scenarios, such as cabinets, panels, islands, finished furniture, TV cabinets, coffee tables, dining tables, tea trays, etc. Generally, 3mm~6mm Sintered Stone can be used for furniture such as door and cabinet panels. 12mm~20mm Sintered Stone can be used as kitchen countertops or dining table tops. It has a large span and many uses. It can be said to be an all-rounder.
The size of the Sintered Stone is vast, and the regular sizes are:
3600×1200mm×(3mm, 6mm), suitable for walls, finishes, and kitchen cabinet door panels;
3200×1500mm×(6mm; only a few designs have 3mm), ideal for borders, finishes, and kitchen cabinet door panels;
3200×1600mm×(12mm, 20mm), ideal for kitchen countertops, desktops, and floors.
Applications of Sintered Stones
12 Wall/Floor Decoration Applications
Large size | Thin and light | Wear-resistant | Easy to cut
Meet the multi-dimensional application of various attribute spaces, commercial spaces, home decoration spaces, public spaces, indoor and outdoor, curtain walls, ground, etc.
Decorative panel application
Thin and light | wear-resistant | high temperature resistant | Easy to care for
Sintered Stone is produced under high temperatures and pressure, and its hardness reaches level 5 or above. Direct use of a steel knife to scratch the Sintered Stone will not cause scratches or damage to the Sintered Stone. It is also highly wear-resistant when used as a floor!
Sintered Stone can replace natural stone, wood, wallpaper, metal, etc., and be made into cabinet door panels, wardrobe door panels, and others. It can be customized into any color and pattern to create a different sense of luxury.
Countertop/Furniture Customization Application
Food safety grade/high-temperature resistance/scratch resistance/strong stain resistance
The impact resistance of a 6mm thick rock plate is equivalent to that of 35mm granite. Even if you chop meat or cut bones on the rock plate, it will not break. The Sintered Stone has a food-grade surface, is healthy and environmentally friendly, and has passed NSF certification. There is no need to worry about mold invading the body. (NSF is a designated collaborating center of the World Health Organization on food safety and drinking water safety and treatment.)
It is non-toxic and non-radiative and can be in direct contact with food; it is not afraid of high temperatures, does not change color when burned at high temperatures; does not release harmful substances; is fire-proof and flame-retardant; is high-pressure, pressed with unique materials, resistant to scratches, and has good anti-fouling properties.
Bathroom applications
Zero water permeability/high density/scratch resistance/strong stain resistance
Diamond-level hardness, not afraid of bumps; zero water permeability, no need to worry about penetration and discoloration; high density, anti-fouling; full of luxury, high-end atmosphere. In addition, the exceptionally high density of Sintered Stone can prevent stains from penetrating, so you don’t have to worry about sewage and stains penetrating the stone, and it is also easy to clean.
building façade applications
Based on the physical properties of fire resistance, frost resistance, and high-temperature resistance, Sintered Stone is an amicable choice for building exterior materials, and its fire resistance level is A1.
Its anti-freeze properties come from strict anti-freeze testing during the production process, and it can withstand low temperatures of -80°C so that it can withstand cold weather without damage.
Sintered Stones can also be customized in color, size, and style according to personal needs. Each home has its own decoration style. Choosing the right home is also a task that users must put effort into. Sintered Stone slabs come in various colors and designs and can be customized in different shapes and sizes.
13 Sintered Stone installation-pay attention to the details of Sintered Stone Construction
Sintered stone has been loved and sought after by all walks of life as soon as it was launched on the market due to its physical properties and decorative aesthetic effects presented in its large size, as well as its super performance and high “rock” value.
The application prospects of Sintered Stone are becoming more precise and transparent, and the market recognition is getting higher and higher. In various fields of architectural decoration, Sintered Stone has gradually become the focus of designers and consumers.
However, during the paving construction of Sintered Stone, problems such as hollowing, falling off, cracking, and insufficient flatness may occur due to poor performance in paving technology, paving environment, auxiliary material ratios, etc., which have been severely restricted.
As the Sintered Stone market develops and matures, it has seriously affected the application and popularization of Sintered Stone and shaken consumers’ confidence in its decorative materials…
Therefore, scientific and reasonable paving methods can not only avoid these problems but also Restore the beauty of Sintered Stone design and decoration to the greatest extent and retain the designer’s original design concept. So, what are Sintered Stone’s specific paving techniques and methods during construction?
- 13-1 Method 1 | Wet Sintered Stone is attached to the wall
Nine steps for wet Sintered Stone wall paving
1. On-site inspection and line ejection:
①: Check the flatness and right angles of the base surface at the construction site, and check the primary conditions such as the strength, waterproofing, location, height, and size of the hydropower structure.
②: Communicate with the ceramic tile paving construction drawings and perform positioning and elastic lines before construction. (Ensure water pipes and wires do not exceed the horizontal line.)
2. Base leveling and treatment:
①: Before paving, ensure that the flatness and verticality of the base layer are ≤4mm/2m. The base layer should be flat, solid, and clean and should be free of defects such as cracks, open water, hollows, sand, pitted surfaces, oil stains, and dirt;
②: For local hollow areas, use a wire brush or a shovel to remove the pulp adhered to the surface layer and then use a polymer to level it; finally, use a broom to clean up the dust and garbage.
③: Wash and moisten the base surface before construction. Construction can only be carried out after the base surface is clear of water.
3. Adhesive preparation:
① Add tap water to the mixing bucket, then add the adhesive step by step. Mixing ratio: 1 part water: 3 parts dry powder (refer to the product packaging instructions for details). Use a low-speed electric mixer to stir evenly into a paste.
② After hydration (resting) for 5-10 minutes, stir twice for about 3 minutes before use. (Do not add water or dry binder powder to the bonding after hydration; start again; otherwise, the bonding effect will be affected.)
4. Base surface spring line division:
① After the base surface has been left for about 3-4 days, you can perform segmented elastic lines and, at the same time, start the standard points of the veneer layer to control the flatness of the finished surface (ground size and levelness).
② Base surface leveling line, adhesive thickness line (not exceeding 7MM), tiling horizontal line (thickness of large board is 6MM)
5. Squeegee on the base layer and back:
①: On the ground base, first use the straight edge of the toothed trowel to apply a layer of adhesive evenly with a thickness of 8-10MM. Use a toothed scoop to comb the adhesive vertically into full, uninterrupted zigzag stripes, and comb it again horizontally.
②: Use a toothed spatula to apply a layer of adhesive on the back of the large board with a thickness of about 8-10mm. Then use a sawtooth edge to comb out the bond at an angle of about 45° to create complete and uninterrupted jagged stripes, and then use the straight edge of the trowel to chamfer the glue on the four sides of the large board to avoid squeezing out excess adhesive during pasting and causing contamination—board surface.
Use a toothed trowel to comb the adhesive vertically into full, uninterrupted zigzag stripes, then search it horizontally.
6. Sintered Stone paving:
① The order of pasting the Sintered Stone is “from the inside out.” The fullness of the adhesive must be ensured to avoid hollowing. Use the specified bright 1MM leveler or matte 1.5MM leveler to ensure that the gap size meets the design requirements and that the width of the opening is consistent.
Note: A strong suction cup is required to help you get off the ground. When paving each type of Sintered Stone, place the leveler base on one side of the slab
7. Vibration and leveling
①: After the large plate is attached to the base surface, use a flat vibrator to adjust the surface material until it is flat.
②: Use a leveler to assist in leaving seams and leveling. Put the pressure cap on the leveler and secure it with pressure pliers. The adhesive can be adjusted for 30 minutes; the large board can be moved and changed within 30 minutes after being pasted, leaving about 1.5MM of brick joints.
8. Surface cleaning and caulking treatment:
①: After the Sintered Stone is pasted, clean up the remaining caulking agent and the surface in time to remove all dust, oil stains, and other contaminants, and there should be no water accumulation in the joints. At the same time, loose adhesive should be removed from the gaps between the ceramic slabs. Carry out caulking treatment after 24 hours of construction.
②: Use the latest epoxy resin caulking agent with non-leakage, zero water absorption, acid and alkali resistance, and high adhesion, match the caulking color consistent with the Sintered Stone, and perform gap filling processing according to specifications to maintain brick joints for a long time Seal cleaning.
9. On-site protection:
To prevent the tiles from being scratched during subsequent construction, it is necessary to lay a floor protective film and a wall corner protective film for protection.
13-2 Method 2 | Wet Sintered Stone Panels are attached to the wall
1. The construction area should be flat and clean based on traditional cement sand plastering layers or floor heating. There should be no debris that affects the construction. The flatness of the base layer should not be more excellent than 3mm for every two linear meters;
2. Before paving, first ensure that the flatness and verticality of the plaster layer are ≤4mm/2m; for local hollow areas, use a wire brush and a shovel to remove the pulp adhered to the surface layer and then level it; finally, Use a broom to clean away dust and garbage;
3. After the base surface has been left for about 3-4 days, the lines will be segmented and divided into sections, and at the same time, the standard points of the surface layer will be veneered to control the flatness of the finished surface;
4. Prepare the unique adhesive for large Sintered Stone according to the product instructions and mix evenly with an electric mixer;
5. Use the straight edge of a toothed spatula to apply a layer of adhesive evenly on the ground substrate. The thickness of the bond depends on the size of the surface material. Use a toothed spatula to comb the adhesive vertically into full, uninterrupted zigzag stripes, and comb it again horizontally;
6. Use a toothed spatula to flatten the adhesive onto the clean surface and apply a layer of it to a thickness of about 6-8mm;
7. The order of pasting large Sintered Stone is “from inside to outside.” The fullness of the adhesive must be ensured to avoid hollowing. According to the design requirements, a positioner of appropriate specifications should be used when pasting large Sintered Stone to ensure that the size of the gap meets the design requirements and the width of the opening is consistent;
8. After the large Sintered Stone is attached to the base surface, use a rubber hammer, plastic flat plate, or a flat vibrator to pound the tiles firmly and adjust the surface material until it is flat. The adjustable time of the adhesive is 30 minutes; that is, the Sintered Stone can be moved and changed within 30 minutes after being pasted;
9. Use a leveler to assist in leaving seams and leveling;
10. Check for hollowing: After one hour of paving, you can use a rubber hammer to tap the brick surface to check whether there is hollowing. If you hear a “hollow” sound from the floor tiles, you must try to re-lay them.
11. After the large Sintered Stone is pasted, clean the remaining adhesive, dust, and sand in time. The tiles can be seamed 24 hours after they are laid. You can use a sponge caulking scraper to clean the gaps between ceramic tiles, wait for the caulking agent to solidify, and then clean up the excess caulking agent.
12. Before using the caulking agent, the gaps between large Sintered Stones should be cleaned first to remove all dust, oil stains, and other contaminants, and there should be no water accumulation in the gaps. At the same time, remove loose adhesive from the gaps between large Sintered Stones.
13-3 Method 3 | Austrian pine board (woodworking board) base
1. Base treatment
Use an Austrian pine board to lay the base. The base needs to be kept flat, and the surface should be clean and free of foreign matter;
2. Leveling the center line of the wall
Before installation, you need to use an infrared level to confirm the position of each wall to confirm the place during the installation process;
3. Determine the position of the Sintered Stone
① Because there will be a 1-3mm error with the Sintered Stone during the initial base treatment, confirming the position in advance is necessary to make the background wall more beautiful after installation. When establishing the work, the top should be flush as the standard, and try to avoid placing the error gap. above;
②If you need to make an opening, you need to confirm the opening position;
4. Confirm the location before applying glue points on the wall
① During the preparation process of marble glue, a small amount of curing agent is used so that the curing time is 15-20 minutes.
The central dots of marble glue are at the board’s four corners.
③ Leave about 5cm unglued at the board interface to avoid affecting the installation of another board.
④ When applying structural glue, the amount of glue should be moderate and fixed at multiple points. The adhesive must be used all along the cavity at the opening position.
- Clean the board surface for installation.
During installation, you must first meet the upper edge of the rock board and then use a suction cup to transport the rock board to the designated position;
6. Place the Sintered Stone at the designated position and make fine adjustments;
① When fine-tuning, pay attention to whether the inner edge of the Sintered Stone is level with the laser’s position. If it is not level, use a tile leveler combined with a suction cup to level it.
② When fixing after leveling, consider whether the board surface is level. You can use a 20mm quartz stone strip as a reference to see whether there are bubbles or apparent unevenness on the board surface.
7. After the Sintered Stone position is adjusted correctly, you need to wait a few minutes (the specific time depends on the solidification of the rubber base).
8. Installation method of two Sintered Stone:
After the installation of panel one is completed, pre-install panel 2 to confirm the position;
② Confirm the opening position on the board surface two and mark it.
It is best to fine-tune the position and height of the board texture splicing.
⑤. Install board two after gluing;
Use a suction cup that can adjust the length of the central axis and the height of the board at the joint between the two panels for fine adjustment.
⑦ The natural seam between the two boards is within 1mm. The size can be appropriately enlarged if the customer has unique requirements and needs to make beautiful seams.
The horizontal position between the two boards must be consistent and flush from top to bottom, and there should be no obvious faults.
⑨. After the installation of the Sintered Stone is completed, 502 needs to be used to fill the center line interface;
9. Open the wire box hole;
① When opening holes, you must change the special saw blade for Sintered Stone and use a marble saw.
② Use water to cool down the whole process of opening the hole.
The opening position ensures the surrounding area is covered with glue when the Sintered Stone is installed.
④For aesthetics and to avoid cracking. You can use a glass drill bit to drill round holes in the corners.
13-4 Method 4 | Sintered Stone composite dry hanging paving Sintered Stonewall
1. Use ink lines to pop up lines on the wall where the Sintered Stone is to be installed;
2. Install & fix the keel;
3. Use multiple aluminum squares to assemble into a grid-like frame, and then coat the outer surface of the structure with lumps of marble glue and structural glue;
4. Press the rock plate tightly with marble glue and structural glue to firmly connect the rock plate and the frame to form the rock plate assembly;
- Fix one end of the S-shaped fastener to the back of the rock panel component, then fasten the rock panel component to the U-shaped keel through the other end of the S-shaped buckle.
13-5 Method 5 | Sintered Stone assembly technology
1. It fully complies with the assembly process. All processing is completed in the factory. There is no need to use adhesive or air nail gun during the installation process, and the construction period is short;
2. Achieve Class A flame retardant performance;
3. The original wall does not need to be leveled in advance. The expansion bolt steel frame is used for leveling, which can meet the peak-to-valley error of 30mm;
4. The steel frame and Sintered Stone are connected with steel hanging fasteners, which can be disassembled and assembled repeatedly more than 400 times, making it easy to repair and replace and meet individual needs;
5. The open pipe laying of water and electricity pipelines can be realized and installed in the horizontal steel frame without the need to groove in the wall;
13-6 Method 6 | Dry hanging of Sintered Stone curtain wall
1. Integrated groove hook
The hook adopts the profile punching method to reduce the risk of the pendant screws loosening and falling off.
2. Buckle edge cover to prevent falling off
Add buckle physical fastening devices for purely physical fixation for super-high-rise dry-hanging, significantly improving wind resistance.
3. Resistant to bending and impact
An aluminum alloy frame is used, and high-density foamed ceramics can be added in the anti-collision area, which makes it more stable and will not break if it encounters an impact.
4. Light material and easy to install
Choose the 6mm thickness + rock plate + aluminum profile structure, and the weight is 8-15kg/m². It is more conducive to outdoor construction and improves safety and construction efficiency.
14: There are seams in the Sintered Stone feature wall. What are the standard treatment methods?
As the central part of interior decoration, many owners need to be more cautious in designing the TV background wall. Sintered Stone appears in the public eye as a new product, and many people will feel fresh about it.
There are fewer customizable shapes for Sintered Stone than there are for stone. The famous Sintered Stone TV background wall matching methods on the market mainly include flat Sintered Stone background walls, suspended Sintered Stone background walls, or Sintered Stone background walls with wooden grilles. Today, we will talk about the general methods of dealing with the gaps in the splicing position of Sintered Stone.
The 1st way is the seamless or whole board.
This kind of TV wall is made of a Sintered Stone whose size shape requires shape. It can be made into a whole piece to make the TV wall. Therefore, this method requires that the size of the Sintered Stone itself be relatively large and the shape cannot exceed the size of the Sintered Stone. So, both conditions need to be met. This TV wall has no seams, so the integrity and pattern continuity are the best. However, there is a slight disadvantage in that the panels are generally relatively large and may need to be transported to the decoration site using an external crane.
The 2nd way is close spelling.
These Sintered stones are directly spliced together during installation, and the seams should be as tight as possible. Although it is said to be sealed, during the installation process, due to the size deviation of the Sintered Stone itself, problems with the wall foundation, or improper installation, there will be a gap of about 1mm at the joint position. This gap is generally left untreated or filled with glue of the same color. In this type of Sintered Stone TV wall, the location of the holes is generally only so evident if you take a closer look. So this is the method we use more often.
The 3rd way is to make beautiful seams.
This method is to directly leave 2-3mm in the position of the joints and then make beautiful joints of the same color or different colors. This installation method is more straightforward, but some customers think it resembles bricks, so Sintered Stone TV walls are generally used. There are relatively few people who use this method.
The 4th way is to inlay metal strips.
This method combines Sintered Stone and titanium or copper strips to make a TV wall. The width and quantity of the titanium or copper strips can be customized according to the effect. It is more varied than a single large slab of rock but also comes in different colors and materials to add layering and beauty. So this is also the more commonly used method now.
The 5th-way gap beauty
Ask a professional stone beautician to fill the gaps neatly and connect the textures on the left and right sides of the hole like a painting. The colors must be consistent to be natural and coherent.
15: there are numerous thicknesses of Sintered Stone. How do you pick out?
Because the Sintered Stone material becomes more recognized and cherished, it’s gradually admired by all and sundry. The Trendy thicknesses of Sintered Stone are 3mm, 4.5mm, 5.5mm, 6mm, 9mm, 12mm, 15mm, 18mm, 20mm, and so on. So, while we pick out Sintered Stone, what are the requirements for choosing the thickness of Sintered Stone for distinct packages? analyze what degrees of different thicknesses ought to be used for
- 3mm thickness of Sintered Stone Large Format Slab
The disadvantage of the 3mm thick Sintered Stone is that it is too skinny and susceptible to bending and deformation, and the overall pressure will be more potent. The gain is that it is mild in weight, brings a particular diploma of light transmittance, and prevents pollution. Therefore, it can’t be utilized in places that require force or small load-bearing and deformation necessities. The current number one use of 3mm thick Sintered Stone is inside the home furnishing industry, in particular, because of the surface layer of door panels.
- 6mm thickness Sintered Stone Jumbo Slab
The advantage of 6mm thick Sintered Stone is their excessive fee overall performance, bending resistance, and lightness. The downside is that although its bending resistance has improved compared to 3mm thick Sintered Stone, it is relatively easy to deform while bearing heavy strain. Consequently, it still needs to be advocated for use in regions that require force or load-bearing. 6mm thick Sintered Stone may be used for wet and dry putting on indoor and outside walls and flooring, door panels, and composite board countertops. But, composite board countertops of this thickness cannot have special-formed edges. They can be used as beneath-counter basins and have to be hung beneath the counter. While moist and dry, depending on the wall and floor, please pay attention to the board’s flatness. Whether dry placing or wet putting, the pressure factors on the back of the rock board should be made during the installation system; the positions ought to be numerous or even to ensure standard flatness and strain. It can efficaciously lessen later deformation and provide the effect after installation.
- 9mm thickness of Sintered Porcelain Slabs
The 9mm Sintered Stone thickness is moderate and may be used on walls or floors. This thickness is the thickest, especially some of the background slabs produced by many ceramic tile producers. Standard ceramic tile shops say this thickness can reach the top in one piece. This thickness is suitable for paving. The technical requirements are lower than those of 3 and 6 and are best for wet pasting, dry striking, etc.
- 12mm thickness of Sintered Stone Glossy Slab
The 12mm thick Sintered Stone has better bending resistance and load-bearing capacity with minimal deformation. Compared with 3mm and 6mm, its thinness is slightly worse, its weight is heavier, and it is no longer suitable for the surface layer of door panels. It can be used for wet pasting and dry putting on indoor and outside partitions and floors, window sill forums, threshold stones, countertops, and various countertops. The countertops with this thickness can be made into single-board, incredibly skinny, and curved countertops—below-counter basins with this thickness. Try and dangle down as much as feasible.
15mm thickness
Sintered stones with a thickness of 15mm and above have the very best hardness, strength, weight, and bending resistance. The rest may be used, except that door panels are typically unused.
- 20mm thickness of Sintered Stone
20mm is the exceptional thickness of kitchen countertops. It may be completed with any placing in one piece if you agree. It’s far perfect and more muscular than anything else.
16: How to choose qualified Sintered Stone
①Cut with a knife
We mentioned earlier that Sintered Stone resists scraping with a knife, which is the most direct way to check. A good Sintered Stone will not show any marks after being sharpened with a knife.
You can see in the animation that the knife is constantly scraping back and forth on the Sintered Stone without any marks (it only costs the blade).
② The surface of the Sintered Stone
The quality of some Sintered Stone production equipment could be better, and some small blisters will appear on the surface after a long time of use.
③Corner treatment
A good Sintered Stone is seen to be solid without flaws. Poor Sintered Stone has an apparent white line on the edge.
④Burn with fire
Sintered Stone fired at high temperatures is resistant to high temperatures and will not change even if burned with an open flame. You can also try using a lighter directly during identification.
15.1 How to distinguish real and fake Sintered Stone
- Smell: Real Sintered Stone is healthy, environmentally friendly, and has no irritating chemical smell.
- Touch: The shiny Sintered Stone feels smooth and has no graininess; the matte Sintered Stone feels delicate and has no sense of frustration.
- Touch: Hit the Sintered Stone with a key; the sound will be clear and crisp.
- Scratching: The Mohs hardness of the Sintered Stone is 6-7. Rubbing with a sharp device will leave no trace on the surface.
- Burning: Put the Sintered Stone sample in the fire. The Sintered Stone will not ignite and burst and has no smell.
16: What is a full-body Sintered Stone?
The whole-body Sintered Stone means that the material, color, and texture of the Sintered Stone are “through-body.” The surface layer of the Sintered Stone is consistent with the embryonic body; that is, the surface and the inside are the same. Even if the full-body Sintered Stone is cut or carved at will, it will not affect its final performance and decorative effects. But there are many Sintered stones to choose from on the market that are not full-body Sintered stones. After cutting, you will find that the embryonic body and surface have significant differences. This type of Sintered Stone’s cutting and splicing method will be relatively simple.
Full-body Sintered Stone is processed from natural stone (such as granite, limestone, etc.) and has the characteristics of high density, high strength, and high hardness. It is characterized by uniform material, dense texture, high hardness, good wear resistance, high surface smoothness and straightness, and higher strength than ordinary solid bricks and thin stones. The thickness of commonly used full-body Sintered Stone ranges from 10mm to 30mm, and the specifications and sizes can be customized according to needs.
The advantage of full-body Sintered Stone is that it is not easily damaged, and problems such as scratches, cracks, and water seepage can be solved to a certain extent. It is processed using vacuum sealing technology to prevent color fading and better maintain the natural stone’s original color and texture. At the same time, the whole-body Sintered Stone also has good fire resistance and safety performance, is non-polluting and non-radioactive to the environment, and meets the requirements of building environmental protection and durability.
16.2. Application and advantages of full-body Sintered Stone in building materials
Full-body Sintered Stone has gradually become an ideal material in modern architecture. It has many applications and can be used for building facades, dry hanging walls, home walls, elevator doors, floors, steps, etc. Compared with traditional stone materials, full-body Sintered Stone has the advantages of lightweight, good plasticity, and simple maintenance. At the same time, there are many choices for full-body Sintered Stone, and different colors, textures, and specifications can be selected according to other scenes and needs.
Full-body Sintered Stone has some other advantages in construction applications. The surface of the whole-body Sintered Stone has high gloss and flatness, which can enhance the texture and modern feel of the building. The whole-body Sintered Stone also has good waterproof performance and anti-fouling ability, which can reduce the maintenance cost of the building.
17: What is Flexible Sintered Stone?
FOR U STONE’s exclusive curved Sintered Stone (bendable Sintered Stone) realizes the possibility of 6mm thick and high curvature curved slabs. The maximum bending arc reaches 120°-180°and can complete cylinders, domes, arc corners, etc. The combination of forms provides the best solution for arc-shaped spaces, maintaining the integrity and unity of indoor space materials, and the shape and curvature can be customized according to design requirements: it can be curved inward or outward, and just three pieces will form a round column.
The advent of curved Sintered Stone has further broadened the application fields of Sintered Stone, from floors, walls, countertops, desktops, cabinets, doors, and refrigerators to circular domes, corridors, curved background walls, round columns, villa spiral staircases, etc. In almost all home spaces, from cutting and processing tea tables, ornaments, and other styling items to outdoor areas such as building exterior walls, Sintered Stone has become an ideal “universal material.”
The new curved Sintered Stone products have been upgraded to a curved surface with a minimum radius of 15cm and a larger arc to meet flexible decoration needs and break through the original bending limitations. Realizing a cylindrical shape can also recognize square columns and whole angles. The two curved shapes of the Sintered Stone-shaped background break through the original single, flat product structure of the Sintered Stone and become more three-dimensional, achieving a new aesthetic.
The new curved Sintered Stone products also bring a unique experience to consumers regarding design. They get more colors and techniques; any curved shape can achieve a continuous pattern design. Cylinders and square columns can be viewed from any angle. The texture is continuous and connected end to end to meet the needs of perfectionist design. Curved Sintered Stone perfectly combines aesthetics and technical skills, making Sintered Stone an ideal all-purpose material that can be used anywhere in the home or public space, truly customizing the entire house.
18: Why Choose Sintered Stone Countertops in the Kitchen?
The poss and Cons of Sintered Stone countertops
Sintered stone countertops come with many blessings. However, only some things are ideal. Please review the pros and cons of using the stone on your countertop.
- It’s Weatherproof and water-proof
Sintered stone is water-proof, and you can use the material to create pool flooring for inground swimming pools. A few companies could make sinks that seem like different stones, contrasting the countertop nicely.
It’s additionally weatherproof in that rain, warm weather, or freezing temperatures don’t bother the stone, and it’s nearly unaffected through warmth or bloodless. So, if you want to create an outdoor kitchen place, the sintered stone might be a splendid preference for the countertop.
- It’s Straightforward to clean.
It is easy to clean sintered stone. Since it’s non-porous, it doesn’t need sealing. So without that renovation, cleaning takes less time.
It’s also resistant to harsh chemical compounds, so many cleansing products may be used to smooth the surfaces.
- It’s meals-safe
Sintered stone is food-safe. Since it’s easy to smooth, using the stone as your kitchen counter is hygienic.
The non-porous cloth additionally allows for the lessening of germs and microorganisms. Getting ready meals at the counter is usually secure, even though now not recommended, and slicing forums are needed to reduce the risk of damage.
- It Resists warmness and staining.
This stone can resist excessive temperatures, making it protective against burning. Because it is non-porous and doesn’t want to be sealed, the sintered stone is noticeably proof against staining.
Here’s a short video on trying out one-of-a-kind staining dealers on sintered stone. See how nicely it holds up:
- Does Sintered Stone Chip?
Not virtually. Underneath everyday use, it’s pretty immune to chipping and scratches.
Here’s another video for your viewing pleasure:
value
It’s tough to find charges, but this website puts the price around the same level as quartz or granite.
- The Downsides to Sintered Stone
even though not many, it has some essential cons:
• It isn’t always advocated to install it yourself because it’s far more complex and may be very heavy due to size, which could cause inconvenience and further exertion charges.
• The stone can crack underneath strain if not leveled efficiently—any other motive experts are endorsed.
• repairs are complicated and pricey. Since slicing must be unique per project, a restore could be inconvenient and expensive. The fabric is durable but may be difficult if it breaks. Look into the warranty of your countertop while shopping.
19: FAQs of Sintered Stone
- What are the basics of Sintered Stone?
It is critical to describe precisely what sintered stone is a product of. The aggregate of substances that make up a sintered stone are debris found in granite and porcelain. These are two extraordinarily coveted materials for indoor layout, and they have been fused to make a product that offers the maximum highly-priced materials within the international run.
Except for sintered stone slabs, the alternative substances of Marble systems are also sublime and distinctive. Test out our blog to discover the arena of Quartzite Slab thoughts and different ones!
- What are the Advantages of Sintered Stone
As a long way as the professionals of sintered stone, there are many. A person who is only sometimes used to looking at sintered stone slabs could not be capable of differentiating them. The best time when it may be evident that a sintered stone is certainly synthetic is if it has an unexpected sample or color. The benefits of the use of sintered stone are:
- Sintered stones are surprisingly long-lasting
- Sintered stones are weatherproof and appropriate for outdoor packages.
- Sintered stone is impervious to heat and bloodless.
- Sintered stones are water resistant and can now not be put on from touch with moisture.
- Sintered stones are stain-resistant and do not acquire spots from chemicals and other products that come into touch with them.
- Sintered stones are tough to damage and no longer have problems with cracks or collected scratches.
- Uniformity for matching stones and slabs on massive-scale initiatives.
- Sintered stones are easy to maintain and hold clean.
- Sintered stones are hygienist and safe for preparing and serving meals.
- The non-porous nature of the sintered stones method will not require sealing to hold their integrity.
- The totality of benefits makes the argument for using sintered stones even more compelling. Think about investing in a sintered stone round dining table that resembles marble and playing all the aesthetics of the stone without all the problems of preservation. If you decide to use actual marble, you could have the high quality of both worlds when you select sintered stone!
- What are the main applications and uses of Sintered Sto? ne
Now it’s time to get to the amusing part and discuss what styles of gadgets sintered stone is used to create. We’ve already touched on some devices in the preceding sections, but we assume it’s better to reveal more of the terrific use of this incredible stone. Sintered stone may be used for nearly any location where natural stone may be used, which includes:
• Kitchen counters, islands, and tabletops
• bathroom countertops and vanities
• Stairways
• flooring
• Wall Cladding and covers
• Patios and outdoor walkways
• round Fireplaces
• Tiling in spas and swimming swimming pools and wet rooms
Sintered stones are available in relatively large slabs, so they may need to be measured and cut down precisely for those initiatives. To cowl large areas with sintered stone, you must use multiple slabs to finish the mission. Thankfully, any other gain of sintered stone is uniform, so it will likely be much less complicated to shape a couple of slabs if wished.
- Can a sintered stone be used for flooring
Yes, the sintered stone is a brand-new alternative for indoor floor coverings,
In interior ornament, similarly to the walls, the most crucial location of tough furnishings is the floor. At the same time, it’s a landed manner that can’t be traded; the selection of beds has become vital.
Floors within the residence decoration are a crucial part of whether the flooring choice is suitable or no longer; the general fashion and temperament of the house, whether the first-class of the ground is excellent or horrific, are related to humans’s exceptional lifestyles.
A more comprehensive choice of fancy colors,
choose FOR U STONE sintered stone can also have the same rustic herbal at-ease feeling as solid wood. not the most effective wood texture, but you may also have a natural stone texture,
water-proof
Anti-slip down
because FOR U STONE sintered stone floors, glazed anti-slip grade to R11, you should not worry about slipping due to water on the floor.
FOR U STONE Sintered Stone ground has a high blank density, and the water absorption charge is nearly zero; don’t worry about floor deformation discoloration.
Antibacterial
FOR U STONE Sintered Stone can efficiently inhibit mites, pet hair, and other allergic materials; FOR U STONE Sintered Stone flooring, with its high density, the water absorption price of virtually 0, can efficiently inhibit the autumn of allergic substances on the ground, antibacterial coating to inhibit the reproduction of the microorganism.
Scratch-resistant
extra long-lasting
secure materials for direct meals contact
FOR U STONE Sintered Stone Mohs hardness can attain 6, to realize the diamond Mohs hardness is 10, so the sintered stone, whether or not as a ground or kitchen or kitchen countertops, does not need to worry approximately every put and tear in daily lifestyles, even in case you use rugged gadgets within the above friction sparks, will not have damage to the Sintered Stone Slabs, but alternatively the friction of hard items may be worn by way of the sintered stone.
Therefore, many motion pictures have some chefs who will use knives to cut vegetables on the floor of the sintered stone; this exercise we do not recommend because it will harm the pointy edge of the blade.
Acid & alkali
resistance
Anti-staining
FOR U STONE Sintered Stone is made via firing at 1300 ℃, an inorganic stone without any harmful materials, so the acidic and alkaline substances we frequently touch daily have no impact on sintered stone. Due to the excessive density of sintered stone blanks, there are almost no pores; sintered stone does not stain.
Also, due to those advantages, the sintered stone is widely utilized in laboratories, kitchens, and significant public places.
- What are the disadvantages of Sintered Stone?
A massive application of sintered stone will make the room experience chillier.
Stone finishes, including herbal marble, artificial marble, tiles, and so forth. While implemented in the interior, these natural or synthetic stones will make humans feel chillier.
However, if you use smooth furniture, like carpets, potted plants, and lighting fixtures, the layout could make up for it, growing a stylish and warm indoor space.
length specifications
The sintered stone regarded at the beginning had been outsized 1600x3200mm, which was no longer friendly to some old apartments that were refurbished due to the fact the elevator could not cross up, and it changed into very trying to get this type of big plate upstairs.
Considering that many clients have raised these troubles with us, FOR U STONE Sintered Stone can offer R&D carrier for our clients; FOR U STONE Sintered Stone can produce 800the width ranging from 800-1600mm, and period of 1000-3600mm. Therefore, the problem of size specification may be solved.
- does sintered stone scratch
Sintered stone is extraordinarily tough, proof against scratching and severe warmth. To properly monitor its sturdiness, resistance, and hardness, the sintered stone product must be located on a stable base (after putting in furniture, laying floors, or making partitions). Sound floor slabs can crack if the ground is unstable or flexible because of carried-out strain or bending. Remember the fact that the standard slab thickness is 12 mm. This cloth can be even thinner – 3 mm, 4 mm, or 6 mm. Thin panels may be used for furniture facades, fire surrounds, ornamental partitions, and indoor and outdoor wall cladding. You would infrequently burn a sintered stone floor; you might need to scratch it with a knife. Some manufacturers are immune to paint, so that graffiti drawings can be quickly done. For that reason, sintered stone panels are often used for cladding school facades.
- Is the sintered stone the same as porcelain
As we cited at the start, it may be easy to confuse these materials specifically if you examine the literature fast and have not investigated every material well. What makes these substances comparable?
Both are Sintered materials
one of the similarities between sintered stone and porcelain is that these surfaces are both “sintered.” We might not pass into full-size detail as to what the period was. However, Wikipedia says the following:
Sintering or frittage is the system of compacting and forming a stable mass of material using warmth or strain without melting it to the factor of liquefaction.
When you study just what takes place all through the sintering technique, it becomes clear that sintering is very much like (and a few might describe it as a form of) the metamorphic method that happens in nature. Sintering transforms precise substances into a wholly different material.
The similarity we’re highlighting between these materials (sintered stone and porcelain) is the technique. Both porcelain and sintered stone employ the sintering manner. There are variations, and we can get to those in a piece; however, what are the consequences of the sintering procedure? A tough, non-porous, and chemical-tolerant floor.
similar Hardness
The material resulting from the sintering manner will align with the elements used in the technique and the forces carried out to the substances. Each porcelain and sintered stone is burdensome. In reality, each is tougher than some granite surfaces. This interprets scratch resistance and sturdiness.
every is Non-porous
one of the lengthy-standing protection requirements for natural stone is that, whether you use a topical sealer, an impregnating sealer, or a meals secure penetrating sealer, natural stone must be sealed. Why is that the case? The motive is that herbal stone is porous and could, without difficulty, be taken in beverages.
However, porcelain and sintered stone are non-porous. The sintering method used on the materials in each sintered stone and porcelain produces a fabric with no pores. Accordingly, these substances do not soak up the liquid. The liquid remains on the surface and does not enter the stone.
Resilience to Cleaners
when a material is dealt with with a penetrating sealer, it provides a demand in the daily floor cleansing. It is no longer a challenging project but a venture. This requirement is that the fabric be wiped clean with a pH-neutral cleanser. As a result, natural stone must be cleaned using this cleanser. If an acidic cleanser is used, the sealer will be damaged, and the advantages could be lost.
In the assessment of natural stone, both porcelain and sintered stone, as we’ve previously said, need no sealer, so these substances do not require a pH-instructed purifier like others. Porcelain and sintered stone are materials that can be cleaned with the usage of ramification cleaners. But neither material is impervious to harm from certain chemical substances. So, it’s essential to read and comply with the instructions given by the producer.
yet to investigate
Contrasting Porcelain With Sintered Stone
although both sintered stone and porcelain substances employ the sintering manner, They vary in multiple crucial respects. First, the raw materials used are distinct. 2d, the sintering process itself varies from one producer to the next.
different raw substances
one of the methods in which porcelain is different from sintered stone is it starts with distinctive raw materials. Porcelain uses essential substances like clay, silica, feldspar, and flint. Then again, sintered stone uses unusual raw materials. Although sintered stone may have material commonplace with porcelain, it has others that porcelain does not have. Do specific natural materials in reality depend on that lot?
It might be challenging for a few to consider that the cloth used in the sintering manner makes that a whole distinction. But it does. In truth, we can elaborate on this factor in a second. However, first, let’s observe our second location of distinction.
Differing Forces in the Course of Sintering
we’ve already hooked up what sintering is. But it can be easy to overlook the info. The quote we stated at the beginning of our discussion mentioned that warmth and pressure had been involved in sintering. But what number of ways are there to supply warmness? Moreover, in what ways can strain be created? Nonetheless, are there other forces that might be added to the sintering technique to yield an exclusive result?
You get the idea, proper? Sintered stone is composed of various forces and materials that form porcelain. The sintering protocol, recipe, or both range from one sintered stone producer to the following. This is why we said earlier that every sintered stone producer varies a chunk about their fabric.
What’s the conclusion? First, porcelain and sintered stone are alike; they’re cared for and maintained similarly. Additionally, they’re both durable and scratch-resistant. However, they fluctuate in components and within the specific techniques through which each is produced. No matter which one you pick out (if you are trying to determine on such a), following the steerage supplied by using the manufacturer will give you the wanted information to get the most from your countertop.
- does sintered stone stain
Sintered stones are stain-resistant and do not gather spots from chemical compounds and other merchandise that come into contact with them. Sintered stones are extremely tough to harm and do not crack or acquire scratches without difficulty.
- does sintered stone break easily
Not really; it depends on the quality and usage of sintered stone.
- What makes the sintered stone break?
Because the surface of Sintered Stones is prone to cracks, cracks may appear during installation and use, which affects the appearance and use effect. The main methods of repairing cracked Sintered Stones are as follows: Commonly used polymer materials are currently used to improve cracked Sintered Stones, such as: Still, today, we are not going to talk about how to repair, but we need to understand why cracks occur in the first place.
1. Temperature changes
Sintered Stone is an inorganic material, and thermal expansion and contraction are natural phenomena. However, Sintered Stones are inorganic materials, which means that temperature changes have a more significant impact on Sintered Stones. When the temperature reaches a certain level, the internal thermal expansion and contraction will cause cracks on the surface of the Sintered Stone, which is especially obvious when the temperature is low. Especially when the temperature is low, the impact of temperature changes on the seams of Sintered Stone slabs is more obvious; if the temperature difference is too significant, thermal expansion and contraction, uneven cold and heat, etc., will occur. This requires us to pay more attention during the installation process.
2. Installation and construction
1. The installation position of the Sintered Stone. If the construction personnel are on site and do not use appropriate pads during the construction process or the installation position of the Sintered Stone is not determined before paving, it results in cracks due to thermal expansion and contraction during installation. ;
2. If the construction personnel are on site and do not consider the possibility of cracking the Sintered Stones later before installation, resulting in cracking of the Sintered Stones;
3. If the construction workers pry up the floor tiles before installing them, and there is no expansion joint between the tiles and the ground, the tiles will crack due to thermal expansion and contraction;
4. The installation location is too close to unique structures such as exterior walls, and sufficient expansion joints are not reserved for processing, resulting in cracks in the Sintered Stone due to thermal expansion and contraction;
5. The gaps must be prepared before installation, or the holes are not in place, and gaps appear later, resulting in cracks.
3. External impact
Some friends may think that Sintered Stone is a natural stone and is unafraid of damage. Sintered Stones are artificial materials, and natural stones have a particular compressive strength. However, external forces inevitably impact them during transportation and installation, causing surface damage.
Solution:
1. When using Sintered Stones, handle them with care.
2. After installation, you can place some green plants or flowers on the countertop to increase the beauty of the space.
4. Other reasons
Cracking of Sintered Stones occurs due to temperature changes, changes in ambient humidity, and carelessness during or after installation. Among them, cracks caused by temperature changes are generally more common. If cracks appear on the surface of the Sintered Stone, it will affect the aesthetics and appearance and bring a bad user experience to consumers.
- does sintered stone chip easily
Yes, the sintered stone will chip for careless uses.
- Repairing Chips In Sintered Stone
Installs, remodels, and even restorations are tasks to, at times, the name for repairing chips in a surface of sintered stone. The cloth is used for various purposes, and like every material available, it isn’t always impervious to multiple sorts of harm. Even imperfections will be in a sintered stone product. Often, those marred spots show up in the form of chips. This newsletter will discuss why chip repair is essential, even for durable substances. We can also communicate what is wanted while repairing a chip in a product crafted from sintered stone.
Additionally, we can cover the stairs necessary to restore a chip in a floor made from sintered stone fabric. To see a video displaying how easy repairing a chip can be, click here to go to a chip repair kit demonstration to peer how easy it can be. You may check out the sintered stone publications for more facts about this material. And here is where you can get extra records on restoring stone chips. Now lower back to the topic to hand: repairing chips in sintered stone.
- Sintered Stone countertops Get Chipped
one of the functions made from materials like sintered stone is countertops. Granted, not all counters are an excellent match for sintered stone, but while the countertop is made from it, being conscious that there can be a need for chip restoration is something to remember. Sintered Stone countertops chip even in places where you will not anticipate this damage.
- Sintered Stone Surfaces Are long-lasting, now not Indestructible
even though a stone countertop or countertops made from sintered stone is durable, it does not imply that the floor can not be broken. Countertops, in particular, may be susceptible to chips. Durable materials can chip in the proper area if they go through surprise or effect. The maximum affected region of a floor is an aspect. Countertops have more than one edge that may chip, especially if a challenging object hits the edge. Restoring a countertop part means any other capability flow of profits for your savings. Or, in case you are on hand with gear, repairing a chip can save you a little money, depending on the rates and frequency you operate the restore gadget.
- Chip restore in Sintered Stone Surfaces.
The technique is straightforward when talking about repairing chips in sintered stone surfaces. Getting the chip repaired will take a piece of effort, time, and patience. However, it’s far worth it for the purchaser. That is due to the fact owners of surfaces have come to comprehend the fabric and the rate involved in changing covers made from sintered stone,
- What is needed to repair a Chip?
Sufficient with the who, when, and why records. Let’s get into the what and how data because it relates to repairing chips in a sintered stone floor. The subsequent list enumerates the gear and components needed to fix and chip in a sintered stone.
- A Milling device to smooth out the Chipped area
- material for Filling within the Chipped phase of the floor
- Coloring Pigment That fits the Sintered Stone’s color
- Dispenser for Filling the Chip With the Filler
- A Flat floor to use as a mildew for the Sintered Stone Slab
- Sintered Stone Chip Repair Steps
- The proper gear to repair a chip is handy at the beginning of the procedure. However, it is an excellent beginning. Using the equipment effectively is what yields the outcomes.
- Repairing chips in a sintered stone surface involves the following steps.
Clean the place of the sintered stone surface that you may be repairing.
Please dispense the dirt from milling out the chipped vicinity and smooth the setting.
Allow the wiped-clean area of the sintered stone to dry.
Space the flat molding floor on the top of the sintered stone slab at once over the spot to be stuffed and clamped down.
The filler and the coloring paste mix the two collectively so that the stuffing is the right color needed to suit the sintered stone floor.
The vicinity of the colored fills the gap between the sintered stone floor and your flat molding surface.
- Could you watch for the filler to harden up and dry?
Clean and refine the filled region’s rims to remove extra stuffing.
Demonstration of surface restoration with a Chip restore package
inside the video below; you can see how easy repairing a chip is when you have all the essential equipment to accomplish and use the challenge effectively.
- Sintered Stone Care & preservation
Professionals and purchasers use floor remedies to care for and preserve sintered stone surfaces, like fabricating sintered stone using precise materials. Again, how the characters are cared for and maintained is affected by their properties.
- Sealing and Stain-resistance
Because sintered stone is non-porous, there may be no need for periodic sealer programs. A sealer is meant for substances that have pores. It makes its manner into the material’s pores (generally herbal stone) and produces a barrier that reduces the absorbency of the stone. But, although sintered stone is non-porous, it is not stain-proof. Instead, it’s miles stain-resistant. Why the distinction? Well, the sintered stone may be stained. It’s straightforward that the stains stay at the stone’s surface and do not enter the material’s pores.
- Removers for distinctive Stains
further to its non-absorbancy, sintered stone additionally withstands chemical compounds very well. Which means it may be cleaned with diverse forms of cleaners. In reality, instead, few chemical substances harm a sintered surface. That isn’t to mention that any cleaner can be used. Clients must constantly study and comply with the care and upkeep instructions furnished by the manufacturer of a selected surface.
Stain-causing dealers come from many bureaucracies and are treated using diffusion of cleaner sorts. Acids, alkaline detergents, solvents, and oxidants are various cleaners that can be used on sintered stone surfaces. Depending on which kind of stain the fabric has, you may use the only purifier type. A few substances that could cause colors include:
Of course, that list is a partial one. But it does as it should mirror the point. Specifically, many substances can cause discolorations to occur on sintered stone. Additionally, every one of those materials responds higher to some cleaners than they do others. One example from the listing above is mineral deposits. Using a cleaner to do away with limescale on a floor for mineral deposits could be very effective.
- surface Cleaners
although no sealers are required for cleaning sintered stone, there are other factors to consider when deciding on a cleaner for sintered stone. For instance, deciding on a streak-unfastened cleaner permits for an accessible floor that isn’t marred via streaks that manifest on all sorts of substances.
As we have seen, sintered stone surfaces are an intriguing and particular choice to be used as complex surfaces. They have several benefits and are available in a diffusion of color and texture options. Whether the sintered stone is healthy for your assignment will depend upon several things. However, knowing about this durable and exciting material will help the selection process.
Related Products